
This module is designed to provide learners with a comprehensive understanding of advanced JavaScript techniques and the jQuery library.
Daniel Krieglstein, Adjunct Instructor, Illinois Institute of Technology
Daniel, Krieglstein| Illinois Institute of Technology (iit.edu)This course covers the creation of Web pages and sites using HTML, CSS, Javascript, jQuery, and graphical applications as well as the client and server architecture of the Internet and related web technologies.
Upon successful completion of this course, you will be able to:
The link to reading materials and resources to learn on the topics can be found in each week's learning module. All materials are available online for free, no required resources need to be purchased. There is no required textbook to supplement the course materials. Note: Be aware that some resources may open in a new tab.
The course consists of 8 modules that focus on the following key areas:
The previous chapter introduced the DOM's ability to update the styles attached to a document. Using JavaScript to add presentational information can save you time and effort, but, for the most part, CSS remains the best tool for the job.
There's one area, however, where CSS can't really help much. If you want to change an element's style information over time, you'll probably need to use JavaScript. CSS3 introduces a number of different transition methods that allow you to animate elements. However, currently, browser support without vendor-specific prefixes is minimal. JavaScript, on the other hand, allows you to execute functions at set intervals. This means that you can alter an element's style with the passage of time.
An element's position in the browser window is presentational information. As such, it is usually added using CSS. Here's an example that sets an element's position on the page:
element {
  position: absolute;
  top: 50px;
  left: 100px;
}
That will position the element 100 pixels from the left of the browser
window and 50 pixels from the top. Here's the DOM equivalent of the same
information:
element.style.position = "absolute";
element.style.left = "100px";
element.style.top = "50px";
Animation is the perfect example of this kind of change. In a nutshell, animation involves changing an element's position over time.
Valid values for the position property are "static", "fixed", "relative", and "absolute". Elements have a position value of "static" by default, which simply means that they appear one after the other in the same sequence as they occur in the markup. The "relative" value is similar. The difference is that relatively positioned elements can be taken out of the regular flow of the document by applying the float property.
By applying a value of "absolute" to an element's position, you can place the element wherever you want in relation to its container. The container is either the document itself or a parent element with a position of "fixed" or "absolute". It doesn't matter where the element appears in the original markup, because its position will be determined by properties like top, left, right, and bottom. You can set any of those properties using pixels or percentages.
Setting an element's top property will place the element a specified distance from the top of the document. An element's bottom property will place it a specified distance from the bottom of the document. Similarly, left and right can be used to place the element a specified distance from the left and right edges of the document, respectively. It's a good idea to use either top or bottom, but not both.
Likewise with left and right. Positioning an element in the document is relatively straightforward. Say you had an element like this:
<p id="message">Whee!</p>
You could set the message element's position in JavaScript with a function like this:
function positionMessage() {
  if (!document.getElementById) return false;
  if (!document.getElementById("message")) return false;
  var elem = document.getElementById("message");
  elem.style.position = "absolute";
  elem.style.left = "50px";
  elem.style.top = "100px";
}
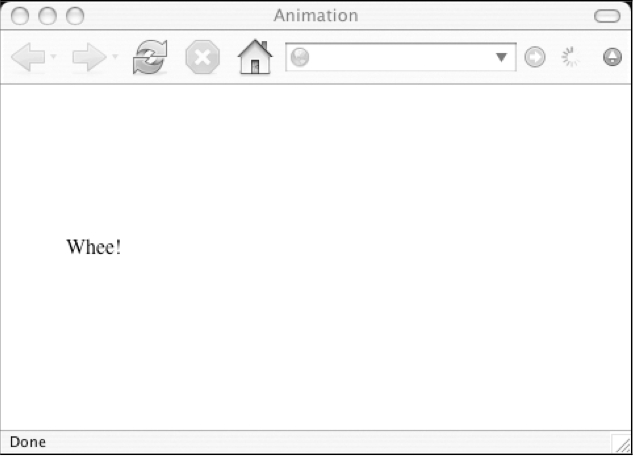
Calling the positionMessage function when the page loads will position the paragraph 50 pixels from the left and 100 pixels from the top of the browser window:
window.onload = positionMessage;
Better yet, use the addLoadEvent function:
function addLoadEvent(func) {
  var oldonload = window.onload;
  if (typeof window.onload != 'function') {
    window.onload = func;
  } else {
    window.onload = function() {
      oldonload();
      func();
    }
  }
}
addLoadEvent(positionMessage);
Here, the element has been positioned absolutely.
{width="4.0in" height="2.8816929133858267in"}Updating an element's position is also quite easy. You just need to run a function that updates a style property like top or left:
function moveMessage() {
  if (!document.getElementById) return false;
  if (!document.getElementById("message")) return false;
  var elem = document.getElementById("message");
  elem.style.left = "200px";
}
But how do you activate that function? If you execute moveMessage when the page loads, the element's position will be updated instantaneously. The original positioning, as specified by positionMessage, will be overridden instantly:
addLoadEvent(positionMessage);
addLoadEvent(moveMessage);
Now the element's position has been changed.
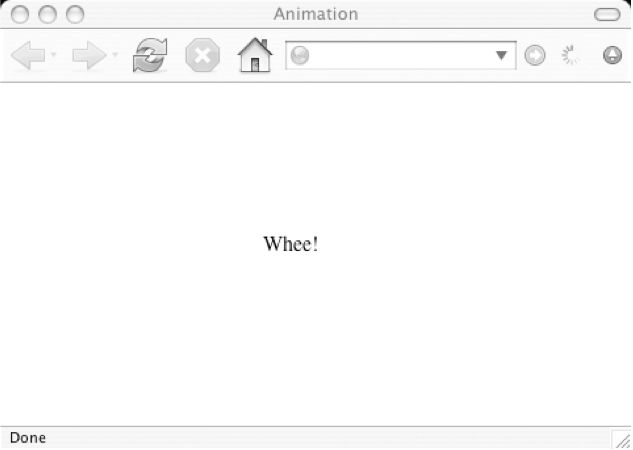{width="4.0in" height="2.843597987751531in"}The change in position is immediate. This isn't true animation. Animation involves changing an element's position over time.
The problem in this situation is that JavaScript is too efficient. Functions are executed one after another without any noticeable pause. To create animation, you need to create delays, which is what we will look at next.
The JavaScript function setTimeout allows you to execute a function after a specified amount of time has elapsed. It takes two arguments. The first argument is a string containing the function you want to execute. The second argument is the number of milliseconds that will elapse before the first argument is executed.
setTimeout("function",interval)
It's a good idea to always assign the result of this function to a variable:
variable = setTimeout("function",interval)
You'll need to do this if you want to cancel the action that has been queued up. You can cancel a pending action using a function called clearTimeout. This function takes one argument, which is a variable that has been assigned to the result of a setTimeout function:
clearTimeout(variable)
Let's update the positionMessage function so that it calls moveMessage after 5 seconds (5,000 milliseconds):
function positionMessage() {
  if (!document.getElementById) return false;
  if (!document.getElementById("message")) return false;
  var elem = document.getElementById("message");
  elem.style.position = "absolute";
  elem.style.left = "50px";
  elem.style.top = "100px";
  movement = setTimeout("moveMessage()",5000);
}
The positionMessage function is called when the page loads:
addLoadEvent(positionMessage);
At first, the message appears at its specified coordinates. After five seconds, the message jumps 150 pixels to the right.
If you want to cancel that action any time before the five seconds elapse, you could do so with this statement:
clearTimeout(movement);
The movement variable refers to the setTimeout function defined in positionMessage. It's a global variable; it wasn't declared with the var keyword. This means the action can be canceled outside the positionMessage function.
Moving an element by 150 pixels after an interval of five seconds is a sort of animation, albeit a very primitive one. Effective animation uses incremental movement. Moving from the starting position to the final location should happen in a series of steps rather than one quick jump.
Let's update the moveMessage function so that movement occurs incrementally. Here's the logic behind the new function:
1. Get the element's current position. 2. If the element has reached its final destination, leave the function. 3. Otherwise, move the element closer to its destination. 4. Repeat from step 1 after a pause.The first step is getting the element's current position. We can do this by querying properties of the element's style property. We want to find the left and top properties. We'll assign them to the variables xpos and ypos, respectively:
var xpos = elem.style.left;
var ypos = elem.style.top;
When the moveMessage function is called after the positionMessage function, xpos will have a value of "50px". The ypos variable will have a value of "100px". These values are strings, which presents a bit of a problem. The next step in the function involves arithmetical comparison operators. We need to work with numbers, not strings.
The JavaScript function parseInt can extract numeric information from a string. If you pass it a string that begins with a number, it will return the number:
parseInt(string)
Here's an example:
parseInt("39 steps");
That will return the number 39.
The parseInt function will return whole numbers (integers). If you need to extract numbers with decimal places (floating-point numbers), there is a corresponding parseFloat function:
parseFloat(string)
We're dealing with integers in the moveMessage function, so we'll use parseInt:
var xpos = parseInt(elem.style.left);
var ypos = parseInt(elem.style.top);
The parseInt function converts the string "50px" to the number 50. The string "100px" becomes the number 100. Now the xpos and ypos variables contain those numbers.
■ Note The use of the parseInt function shown here works only when the elements have been assigned a position using a DOM script or the style property.
The next few steps in the moveMessage function require the use of a lot of comparison operators.
The first comparison is a test for equality. We want to find out if xpos is equal to the final left position and if ypos is equal to the final top position. If they are, we'll exit the function. We can do this test by using the comparison operator, which consists of two equal signs (remember that a single equal sign is used for assignment)
if (xpos == 200 && ypos == 100) {
  return true;
}
Everything after this line will be executed only if the message element has not reached its final position.
Next, we'll update the xpos and ypos numbers based on their relationship to the final position. We want to bring them both closer to the final coordinates. If the value of xpos is less than the final left position, increase it by one:
if (xpos < 200) {
  xpos++;
}
If it's greater than the final left position, decrease it:
if (xpos > 200) {
  xpos--;
}
The same applies for the relationship between the ypos variable and the final top position:
if (ypos < 100) {
  ypos++;
}
if (ypos > 100) {
  ypos--;
}
You can see why we need xpos and ypos to be numbers rather than strings. We're using the less-than and greater-than operators to compare numerical values and update the variables accordingly.
Now we want to apply the xpos and ypos variables to the style property of the element. We do this by adding the string "px" to their values and applying them to the left and top properties:
elem.style.left = xpos + "px";
elem.style.top = ypos + "px";
Finally, we want to repeat the whole function afresh after a slight pause. We'll make the pause one hundredth of a second, which is ten milliseconds:
movement = setTimeout("moveMessage()",10);
The finished moveMessage function looks like this:
function moveMessage() {
  if (!document.getElementById) return false;
  if (!document.getElementById("message")) return false;
  var elem = document.getElementById("message");
  var xpos = parseInt(elem.style.left);
  var ypos = parseInt(elem.style.top);
  if (xpos == 200 && ypos == 100) {
    return true;
  }
  if (xpos < 200) {
    xpos++;
  }
  if (xpos > 200) {
    xpos--;
  }
  if (ypos < 100) {
    ypos++;
  }
  if (ypos > 100) {
    ypos--;
  }
  elem.style.left = xpos + "px";
  elem.style.top = ypos + "px";
  movement = setTimeout("moveMessage()",10);
}
The message moves across the screen, one pixel at a time. Once the top property is "100px" and the left property is "200px", the function stops. That's animation. It's pretty pointless, but it's animation nonetheless. We will be applying the same principles to something much more useful later in this chapter.
As it stands, the moveMessage function accomplishes a very specific task. It moves a specific element to a specific place, pausing for a specific amount of time between movements. All of that information is hard-coded into the function:
function moveMessage() {
  if (!document.getElementById) return false;
  if (!document.getElementById("message"))
  return false;
  var elem = document.getElementById("message");
  var xpos = parseInt(elem.style.left);
  var ypos = parseInt(elem.style.top);
  if (xpos == 200 && ypos == 100) {
    return true;
  }
  if (xpos < 200) {
    xpos++;
  }
  if (xpos > 200) {
    xpos--;
  }
  if (ypos < 100) {
    ypos++;
  }
  if (ypos > 100) {
    ypos--;
  }
  elem.style.left = xpos + "px";
  elem.style.top = ypos + "px";
  movement = setTimeout("moveMessage()",10);
}
If all of those things were variables, the function would be a lot more flexible. By abstracting the moveMessage function, you can create something more portable and reusable.
Call your new function moveElement. Unlike moveMessage, this function will take a number of arguments.
These are the things that you can vary each time you call the function:
These arguments should all have descriptive names:
Begin the moveElement function with these arguments:
function moveElement(elementID,final_x,final_y,interval) {
Substitute these for the values that were previously hard-coded into moveMessage. The moveMessage function began with these lines:
if (!document.getElementById) return false;
if (!document.getElementById("message")) return false;
var elem = document.getElementById("message");
Replace all the instances of getElementById("message") with getElementById(elementID):
if (!document.getElementById) return false;
if (!document.getElementById(elementID)) return false;
var elem = document.getElementById(elementID);
The variable elem now refers to whichever element you want to move.
The next step of the function remains the same. The left and top properties of the element are converted to numbers and assigned to the variables xpos and ypos, respectively:
var xpos = parseInt(elem.style.left);
var ypos = parseInt(elem.style.top);
Next, check to see if the element has reached its final position. In moveMessage, these coordinates were the values 200 (for the left position) and 100 (for the top position):
if (xpos == 200 && ypos == 100) {
  return true;
}
In moveElement, these coordinates are provided by the arguments final_x and final_y:
if (xpos == final_x && ypos == final_y) {
  return true;
}
Update the values of the xpos and ypos variables. If xpos is less than the final left position, increase its value by one.
The final left position used to be hard-coded as 200:
if (xpos < 200) {
  xpos++;
}
Now the final left position is contained in the final_x argument:
if (xpos < final_x) {
  xpos++;
}
Likewise, if the value of xpos is greater than the final left position, decrease the value of xpos by one:
if (xpos > final_x) {
  xpos--;
}
Do the same for ypos. If its value is less than final_y, increase it by one. If it is greater than final_y, decrease it by one:
if (ypos < final_y) {
  ypos++;
}
if (ypos > final_y) {
  ypos--;
}
The next step remains the same. Update the left and top style properties of the element elem.
Assign the values of xpos and ypos with the string "px" attached:
elem.style.left = xpos + "px";
elem.style.top = ypos + "px";
Finally, we want to call the function again after a suitable interval. In moveMessage, this was quite straightforward. The moveMessage function is called after ten milliseconds:
movement = setTimeout("moveMessage()",10);
In moveElement, it gets a little trickier. As well as calling the function again, we need to pass it the same arguments: elementID, final_x, final_y, and interval. The whole thing needs to be contained as a string:
"moveElement('"+elementID+"',"+final_x+","+final_y+","+interval+")"
That's a lot of concatenating! Rather than inserting that long string directly into the setTimeout function, assign the string to a variable called repeat:
var repeat =
"moveElement('"+elementID+"',"+final_x+","+final_y+","+interval+")";
Now we can simply insert repeat as the first argument of the setTimeout function. The second argument is the length of the pause before the first argument is called. This used to be hard-coded as ten milliseconds. Now it's whatever value is contained by the variable interval:
movement = setTimeout(repeat,interval);
}
The finished moveElement function looks like this:
function moveElement(elementID,final_x,final_y,interval) {
  if (!document.getElementById) return false;
  if (!document.getElementById(elementID)) return false;
  var elem = document.getElementById(elementID);
  var xpos = parseInt(elem.style.left);
  var ypos = parseInt(elem.style.top);
  if (xpos == final_x && ypos == final_y) {
    return true;
  }
  if (xpos < final_x) {
    xpos++;
  }
  if (xpos > final_x) {
    xpos--;
  }
  if (ypos < final_y) {
    ypos++;
  }
  if (ypos > final_y) {
    ypos--;
  }
  elem.style.left = xpos + "px";
  elem.style.top = ypos + "px";
  var repeat =
  "moveElement('"+elementID+"',"+final_x+","+final_y+","+interval+")";
  movement = setTimeout(repeat,interval);
}
Save the moveElement function to a file called moveElement.js. Place this file in a folder called scripts, along with that old workhorse, addLoadEvent.js.
Let's take this function for a test drive.
Start by re-creating the previous example. Create a document called message.html, which contains a paragraph identified as "message":
<!DOCTYPE html>
<html lang="en">
<head>
  <meta charset="utf-8" />
  <title>Message</title>
</head>
<body>
  <p id="message">Whee!</p>
</body>
</html>
Before we can animate the message, we need to position it. Write another JavaScript file called positionMessage.js. At the end of the positionMessage function, call the moveElement function:
function positionMessage() {
  if (!document.getElementById) return false;
  if (!document.getElementById("message")) return false;
  var elem = document.getElementById("message");
  elem.style.position = "absolute";
  elem.style.left = "50px";
  elem.style.top = "100px";
  moveElement("message",200,100,10);
}
addLoadEvent(positionMessage);
We are passing the string "message" as the value of the elementID argument. The final_x argument is 200. The final_y argument is 100. The value of interval is 10.
Now you have three files in your scripts folder: addLoadEvent.js, positionMessage.js, and moveElement.js. Reference those files from message.html using <script> tags:
<!DOCTYPE html>
<html lang="en">
<head>
  <meta charset="utf-8" />
  <title>Message</title>
</head>
<body>
  <p id="message">Whee!</p>
  <script src="scripts/addLoadEvent.js"></script>
  <script src="scripts/positionMessage.js"></script>
  <script src="scripts/moveElement.js"></script>
</body>
</html>
Load message.html in a web browser to see the animation in action. The element moves horizontally across the screen.
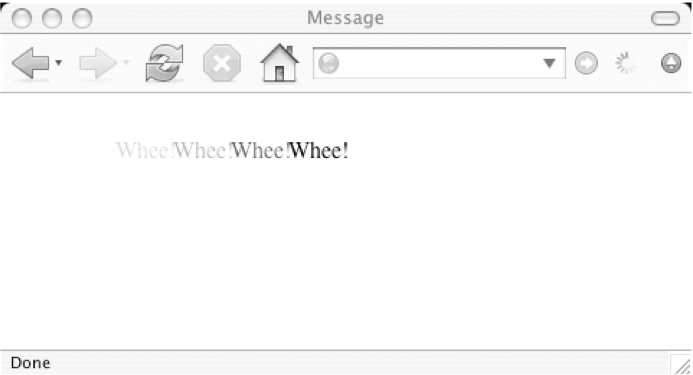{width="4.0in" height="2.164656605424322in"}So far, so good. The moveElement function is working exactly like the moveMessage function. You abstracted the function so that you could send it any arguments you like. By altering the values of final_x and final_y, you can change the direction of the animation. Altering the value of interval changes the speed of the animation:
function moveElement(elementID,final_x,final_y,interval)
Update the last line of the positionMessage function in positionMessage.js so that these three values are changed:
function positionMessage() {
if (!document.getElementById) return false;
if (!document.getElementById("message")) return false;
var elem = document.getElementById("message");
elem.style.position = "absolute";
elem.style.left = "50px";
elem.style.top = "100px";
moveElement("message",125,25,20);
}
addLoadEvent(positionMessage);
Refresh message.html in a web browser to see the change. The element now moves diagonally and more slowly.
The other argument that you can change in moveElement is the value of elementID:
function moveElement(elementID,final_x,final_y,interval)
Add a new element to message.html. Give it an id attribute of "message2":
<!DOCTYPE html>
<html lang="en">
<head>
  <meta charset="utf-8" />
  <title>Message</title>
</head>
<body>
  <p id="message">Whee!</p>
  <p id="message2">Whoa!</p>
  <script src="scripts/addLoadEvent.js"></script>
  <script src="scripts/positionMessage.js"></script>
  <script src="scripts/moveElement.js"></script>
</body>
</html>
Now update positionMessage.js. Set the initial position of "message2" and call the moveElement function again, this time passing it "message2" as the first argument:
function positionMessage() {
  if (!document.getElementById) return false;
  if (!document.getElementById("message")) return false;
  var elem = document.getElementById("message");
  elem.style.position = "absolute";
  elem.style.left = "50px";
  elem.style.top = "100px";
  moveElement("message",125,25,20);
  if (!document.getElementById("message2")) return false;
  var elem = document.getElementById("message2");
  elem.style.position = "absolute";
  elem.style.left = "50px";
  elem.style.top = "50px";
  moveElement("message2",125,125,20);
}
addLoadEvent(positionMessage);
Reload message.html to see the new animation. Both elements move in different directions at the same time.
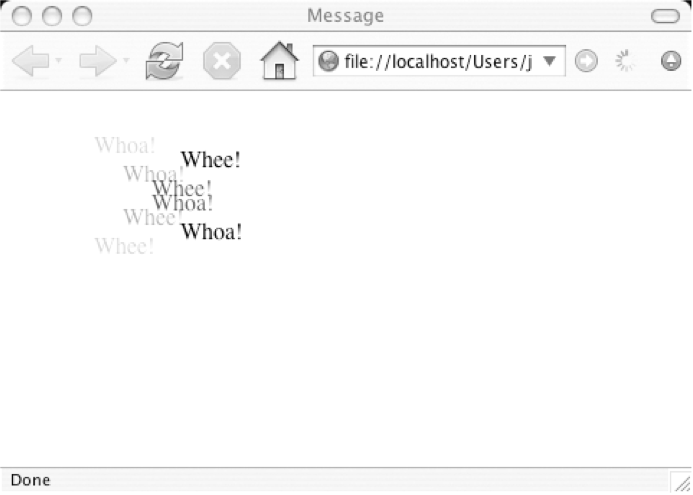{width="4.0in" height="2.8571423884514435in"}The moveElement function is doing all the work in both cases. By simply changing the arguments that you send to the function, you can reuse it as often as you like. This is the great advantage of using arguments instead of hard-coding values.
We have a web page that contains a list of links. When the user hovers over one of these links, we want to provide some kind of sneak preview of where the link will lead---we would like to show an image.
The document is called list.html. Here's the markup:
<!DOCTYPE html>
<html lang="en">
<head>
  <meta charset="utf-8" />
  <title>Web Design</title>
</head>
<body>
  <h1>Web Design</h1>
  <p>These are the things you should know.</p>
  <ol id="linklist">
    <li><a href="structure.html">Structure</a></li>
    <li><a href="presentation.html">Presentation</a></li>
    <li><a href="behavior.html">Behavior</a></li>
  </ol>
</body>
</html>
Each link leads to a page covering a particular aspect of web design. The text within each link succinctly describes the content of the linked page.
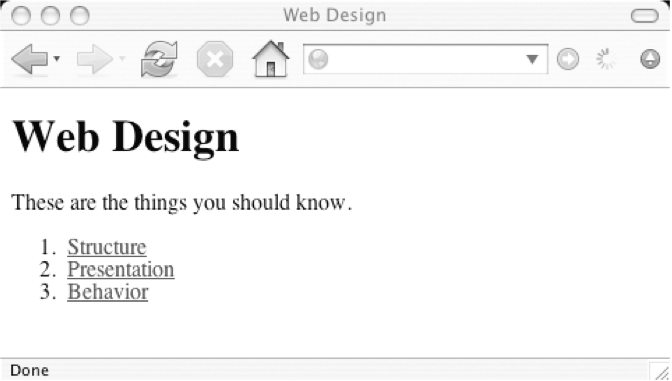{width="4.0in" height="2.267936351706037in"}As it stands, this document is perfectly fine. That said, showing a visual clue about the destination documents would be a nice touch.
We want to show the image when an onmouseover event handler is triggered, instead of an onclick event.
We could adapt the image gallery script. All we would need to do is change the event handler for each link from onclick to onmouseover. That would work, but it wouldn't be very smooth. The first time that the user hovers over a link, the new image would be loaded. Even on a fast connection, this will take a little time. We want a more immediate response.
If we use a different image for the visual preview of each link, there will be delays in swapping out the images. Besides, simply swapping out the images isn't the effect we want. We're looking for something with a bit more pizzazz.
Here's what we'll do:
1. Make a composite image of all the previews. 2. Hide most of this image. 3. When the user hovers over a link, display just a part of the image.I've made a composite image of the three previews plus one default view.
{width="4.0in" height="1.0103707349081366in"}The image is called topics.gif. It is 400 pixels wide and 100 pixels tall. We'll insert the topics.gif image into list.html, giving it an id of "preview":
<!DOCTYPE html>
<html lang="en">
<head>
  <meta charset="utf-8" />
  <title>Web Design</title>
</head>
<body>
  <h1>Web Design</h1>
  <p>These are the things you should know.</p>
  <ol id="linklist">
    <li><a href="structure.html">Structure</a></li>
    <li><a href="presentation.html">Presentation</a></li>
    <li><a href="behavior.html">Behavior</a></li>
  </ol>
  <img src="images/topics.gif" alt="building blocks of web design"
  id="preview" />
</body>
</html>
The web page now contains the list of links and the composite image.
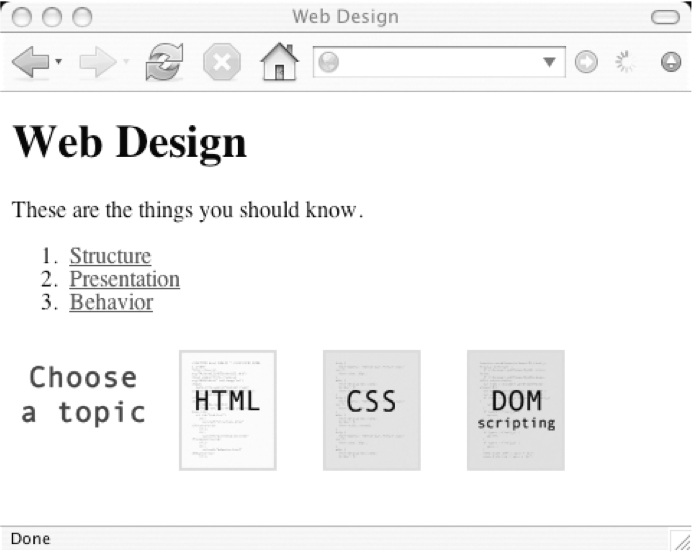{width="4.0in" height="3.1860312773403323in"}Right now, the entire image is visible. We want only a 100-by-100 pixel portion to be visible at any one time. We can't do that with JavaScript, but we can do it with CSS.
The CSS overflow property dictates how content within an element should be displayed when the content is larger than its container element. When an element contains content that is larger than itself, there is an overflow. In that situation, you can clip the content so that only a portion of it is visible. You can also specify whether or not the web browser should display scrollbars, allowing the user to see the rest of the content.
There are four possible values for the overflow property:
- "visible": If the overflow of an element is set to "visible", then no clipping occurs. The content overflows and is rendered outside the element. - "hidden": A value of "hidden" will cause the excess content to be clipped. Only a portion of the content will be visible. - "scroll": The "scroll" value is similar to "hidden". The content will be clipped, but the web browser will display scrollbars so that the rest of the content can be viewed. - "auto": A value of "auto" is just like "scroll", except that the scrollbars will be displayed only if the content overflows its container element. If there is no overflow, no scrollbars appear.Of these four values, "hidden" sounds like the most promising for our purposes. We want to display just a 100-by-100 pixel portion of an image that is 400-by-100 pixels in size.
First, let's wrap the image in a container element. We'll put it in a div element with an id of "slideshow":
<div id="slideshow">
<img src="images/topics.gif" alt="building blocks of web design"
id="preview" />
</div>
Now, we'll create a style sheet called layout.css. Put this file in a folder called styles.
In layout.css, we can set the size of the "slideshow" div:
#slideshow {
  width: 100px;
  height: 100px;
  position: relative;
}
Setting the position to relative is important because we want to use an absolute position for the child image. By using relative, the 0,0 position for children elements will be the upper-left corner of the slideshow div.
By applying an overflow value of "hidden", we can ensure that the content within the div will be clipped:
#slideshow {
  width: 100px;
  height: 100px;
  position: relative;
  overflow: hidden;
}
We're attaching the layout.css style sheet to list.html using a <link> in the head of the document:
<!DOCTYPE html>
<html lang="en">
<head>
  <meta charset="utf-8" />
  <title>Web Design</title>
  <link rel="stylesheet" href="styles/layout.css" media="screen"/>
</head>
<body>
  <h1>Web Design</h1>
  <p>These are the things you should know.</p>
  <ol id="linklist">
    <li><a href="structure.html">Structure</a></li>
    <li><a href="presentation.html">Presentation</a></li>
    <li><a href="behavior.html">Behavior</a></li>
  </ol>
  <div id="slideshow">
    <img src="images/topics.gif" alt="building blocks of web design"
    id="preview" />
  </div>
</body>
</html>
Load list.html in a web browser to see the difference. The image has been clipped. Now only a portion of topics.gif---only the first 100 pixels---is visible.
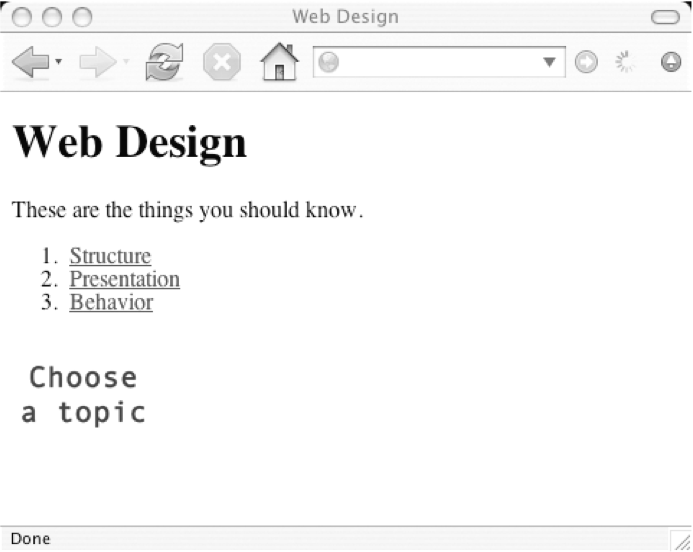{width="4.0in" height="3.1860312773403323in"}The next part of the plan revolves around the actions of the user. We want to display a different portion of topics.gif in the "slideshow" div depending on which link the user hovers the mouse over.
This is a behavioral change and definitely a job for JavaScript and the DOM.
We'll use the moveElement function to move the topics.gif image around. We'll move the image to the left or to the right, depending on which link the user is currently hovering over.
We need to attach that behavior (calling the moveElement function) to the onmouseover event of each link in the link list.
Here's a function called prepareSlideshow, which does just that:
function prepareSlideshow() {
  // Make sure the browser understands the DOM methods
  if (!document.getElementsByTagName) return false;
  if (!document.getElementById) return false;
  // Make sure the elements exist
  if (!document.getElementById("linklist")) return false;
  if (!document.getElementById("preview")) return false;
  // Apply styles to the preview image
  var preview = document.getElementById("preview");
  preview.style.position = "absolute";
  preview.style.left = "0px";
  preview.style.top = "0px";
  // Get all the links in the list
  var list = document.getElementById("linklist");
  var links = list.getElementsByTagName("a");
  // Attach the animation behavior to the mouseover event
  links[0].onmouseover = function() {
    moveElement("preview",-100,0,10);
  }
  links[1].onmouseover = function() {
    moveElement("preview",-200,0,10);
  }
  links[2].onmouseover = function() {
    moveElement("preview",-300,0,10);
  }
}
First, the prepareSlideshow function checks for browser compatibility with the DOM methods that will be used:
if (!document.getElementsByTagName) return false;
if (!document.getElementById) return false;
Next, there's a check to make sure that the "linklist" and "preview" elements exist. Remember that "preview" is the id value of the topics.gif image.
if (!document.getElementById("linklist")) return false;
if (!document.getElementById("preview")) return false;
After that, a default position is given to the "preview" image. We're setting the left property to "0px" and the top property to "0px":
var preview = document.getElementById("preview");
preview.style.position = "absolute";
preview.style.left = "0px";
preview.style.top = "0px";
This doesn't mean that the topics.gif image will appear in the top-left corner of the screen. Instead, it will appear in the top-left corner of its container element, the "slideshow" div. That's because the CSS position value of the div is "relative". Any absolutely positioned elements contained by a relatively positioned element will be placed in relation to that container element. In other words, the "preview" image will appear zero pixels to the left and zero pixels from the top of the "slideshow" element.
Finally, we're attaching the onmouseover behaviors to the links in the list. The variable links contains a node set of all the a elements contained within the "linklist" element. The first link is links[0], the second link is links[1], and the third link is links[2].
var list = document.getElementById("linklist");
var links = list.getElementsByTagName("a");
When the user hovers over the first link, the moveElement function is called. The elementID argument has a value of "preview". The final_x argument has a value of -100. The final_y argument has a value of 0. The interval argument is ten milliseconds.
links[0].onmouseover = function() {
  moveElement("preview",-100,0,10);
}
The same behavior applies for the second link, except that the final_x argument is -200:
links[1].onmouseover = function() {
  moveElement("preview",-200,0,10);
}
The third link will move the "preview" element -300 pixels to the left:
links[2].onmouseover = function() {
  moveElement("preview",-300,0,10);
}
The prepareSlideshow function is called using the addLoadEvent function. The behaviors are attached when the page loads.
addLoadEvent(prepareSlideshow);
Save the prepareSlideshow function to a file called prepareSlideshow.js in a folder called scripts.
Place the moveElement.js and addLoadEvent.js files in the same folder.
We can reference all three scripts from list.html by adding <script> tags immediately before the closing </body> tag:
<!DOCTYPE html>
<html lang="en">
<head>
  <meta charset="utf-8" />
  <title>Web Design</title>
  <link rel="stylesheet" href="styles/layout.css" media="screen"
  />
</head>
<body>
  <h1>Web Design</h1>
  <p>These are the things you should know.</p>
  <ol id="linklist">
    <li><a href="structure.html">Structure</a></li>
    <li><a href="presentation.html">Presentation</a></li>
    <li><a href="behavior.html">Behavior</a></li>
  </ol>
  <div id="slideshow">
    <img src="images/topics.gif" alt="building blocks of web design"
    id="preview" />
  </div>
  <script src="scripts/addLoadEvent.js"></script>
  <script src="scripts/moveElement.js"></script>
  <script src="scripts/prepareSlideshow.js"></script>
</body>
</html>
Load list.html in a web browser. Hover over one of the links in the list to see the slideshow in action.
{width="4.0in" height="3.1860312773403323in"}Depending on which link in the list you hover over, a different portion of the topics.gif image will slide into view.
But something is not quite right. If you move quickly from link to the link, the animation becomes confused. There's something wrong with the moveElement function.
The animation problem is being caused by a global variable. When we abstracted the moveMessage function and turned it into the moveElement function, we left the variable movement as it was:
function moveElement(elementID,final_x,final_y,interval) {
  if (!document.getElementById) return false;
  if (!document.getElementById(elementID)) return false;
  var elem = document.getElementById(elementID);
  var xpos = parseInt(elem.style.left);
  var ypos = parseInt(elem.style.top);
  if (xpos == final_x && ypos == final_y) {
    return true;
  }
  if (xpos < final_x) {
    xpos++;
  }
  if (xpos > final_x) {
    xpos--;
  }
  if (ypos < final_y) {
    ypos++;
  }
  if (ypos > final_y) {
    ypos--;
  }
  elem.style.left = xpos + "px";
  elem.style.top = ypos + "px";
  var repeat =
  "moveElement('"+elementID+"',"+final_x+","+final_y+","+interval+")";
  movement = setTimeout(repeat,interval);
}
This is causing a problem now that the moveElement function is being called whenever the user hovers over a link. Regardless of whether or not the previous call to the function has finished moving the image, the function is being asked to move the same element somewhere else. In other words, the moveElement function is attempting to move the same element to two different places at once, and the movement variable has become the rope in a tug of war.
As the user quickly moves from link to link, there is a backlog of events building up in the setTimeout queue. We can flush out this backlog by using clearTimeout:
clearTimeout(movement);
But if this statement is executed before movement has been set, we'll get an error. We can't use a local variable:
var movement = setTimeout(repeat,interval);
If we do that, the clearTimeout statement won't work; the movement variable will no longer exist. We can't use a global variable.
We can't use a local variable. We need something in between. We need a variable that applies just to the element being moved.
Element-specific variables do exist. In fact, we've been using them all the time. What I've just described is a property.
Until now, we've used properties provided by the DOM: element.firstChild, element.style, and so on. You can also assign your own properties:
element.property = value
If you wanted, you could create a property called foo with a value of "bar":
element.foo = "bar";
It's just like creating a variable. The difference is that the variable belongs just to that element.
Let's change movement from being a global variable to a property of the element being moved, elem.
That way, we can test for its existence and, if it exists, use clearTimeout.
function moveElement(elementID,final_x,final_y,interval) {
  if (!document.getElementById) return false;
  if (!document.getElementById(elementID)) return false;
  var elem = document.getElementById(elementID);
  if (elem.movement) {
    clearTimeout(elem.movement);
  }
  var xpos = parseInt(elem.style.left);
  var ypos = parseInt(elem.style.top);
  if (xpos == final_x && ypos == final_y) {
    return true;
  }
  if (xpos < final_x) {
    xpos++;
  }
  if (xpos > final_x) {
    xpos--;
  }
  if (ypos < final_y) {
    ypos++;
  }
  if (ypos > final_y) {
    ypos--;
  }
  elem.style.left = xpos + "px";
  elem.style.top = ypos + "px";
  var repeat =
  "moveElement('"+elementID+"',"+final_x+","+final_y+","+interval+")";
  elem.movement = setTimeout(repeat,interval);
}
Whichever element is currently being moved by the moveElement function is assigned a property called movement. If the element already has this property at the start of the function, it is reset using clearTimeout. This means that even if the same element is being told to move in different directions, there is only ever one setTimeout statement.
Reload list.html. Moving quickly from link to link no longer creates a problem. There is no backlog of events being queued up. The animation changes direction as you move up and down the list of links. Still, the animation is a bit lackluster.
The moveElement function moves an element one pixel at a time until it reaches the coordinates specified by the final_x and final_y arguments. The movement is smooth, but it's also kind of boring. Let's spice up the animation a bit.
Take a look at this simple bit of code in moveElement.js:
if (xpos < final_x) {
  xpos++;
}
The variable xpos is the element's current left position. The variable final_x is the element's final left position. This piece of code states, "If the variable xpos is less than the variable final_x, increase the value of xpos by one." No matter how far away the element is from its final position, it will always move toward it one pixel at a time. To add some interest, we'll change that.
If the element is far away from its final position, we want it to move a large distance. If the element is near to its final position, we want it to move a short distance.
First, we need to figure out how far the element is from its final destination. If xpos is less than final_x, we want to know by how much. We can find out by subtracting xpos, the current left position, from final_x, the desired left position:
dist = final_x - xpos;
That's the distance that the element needs to travel. We'll move the element one-tenth of this distance.
dist = (final_x - xpos)/10;
xpos = xpos + dist;
This will move the element one-tenth of the distance it needs to go. I've chosen one-tenth as a nice round fraction. You can try other values if you like,
If xpos is 500 pixels away from final_x, the variable dist will have a value of 50. The value of xpos is increased by 50. If xpos is 100 pixels less than final_x, xpos is increased by ten.
A problem occurs when the distance between xpos and final_x is less than ten. When that value is divided by ten, the result will be less than one. You can't move an element by less than one pixel.
Using the ceil property of the Math object, you can round up the value of the variable dist. The ceil property has the following syntax:
Math.ceil(number)
This will round up any floating-point number to the nearest integer. There is a corresponding floor property that will round any floating-point number down to the nearest integer. The round property will round any floating-point number to whichever whole number is closest:
Math.floor(number)
Math.round(number)
For the moveElement function, we'll round upward. If we used floor or round, the element might never reach its final destination.
dist = Match.ceil((final_x - xpos)/10);
xpos = xpos + dist;
This covers the situation when xpos is less than final_x:
if (xpos < final_x) {
dist = Math.ceil((final_x - xpos)/10);
xpos = xpos + dist;
}
If xpos is greater than final_x, then the distance to travel is calculated by subtracting final_x from xpos. This value is divided by ten and rounded up to the nearest whole number to give the variable dist.
This is then subtracted from xpos to bring the element closer to its final destination.
if (xpos > final_x) {
  dist = Math.ceil((xpos - final_x)/10);
  xpos = xpos - dist;
}
The same logic applies for ypos and final_y:
if (ypos < final_y) {
  dist = Math.ceil((final_y - ypos)/10);
  ypos = ypos + dist;
}
if (ypos > final_y) {
  dist = Math.ceil((ypos - final_y)/10);
  ypos = ypos - dist;
}
For good measure, don't forget to declare the dist variable alongside xpos and ypos:
var xpos = parseInt(elem.style.left);
var ypos = parseInt(elem.style.top);
var dist = 0;
The updated moveElement function looks like this:
function moveElement(elementID,final_x,final_y,interval) {
  if (!document.getElementById) return false;
  if (!document.getElementById(elementID)) return false;
  var elem = document.getElementById(elementID);
  if (elem.movement) {
    clearTimeout(elem.movement);
  }
  var xpos = parseInt(elem.style.left);
  var ypos = parseInt(elem.style.top);
  var dist = 0;
  if (xpos == final_x && ypos == final_y) {
    return true;
  }
  if (xpos < final_x) {
    dist = Math.ceil((final_x - xpos)/10);
    xpos = xpos + dist;
  }
  if (xpos > final_x) {
    dist = Math.ceil((xpos - final_x)/10);
    xpos = xpos - dist;
  }
  if (ypos < final_y) {
    dist = Math.ceil((final_y - ypos)/10);
    ypos = ypos + dist;
  }
  if (ypos > final_y) {
    dist = Math.ceil((ypos - final_y)/10);
    ypos = ypos - dist;
  }
  elem.style.left = xpos + "px";
  elem.style.top = ypos + "px";
  var repeat =
  "moveElement('"+elementID+"',"+final_x+","+final_y+","+interval+")";
  elem.movement = setTimeout(repeat,interval);
}
Save these changes to moveElement.js. Reload list.html to see the difference.
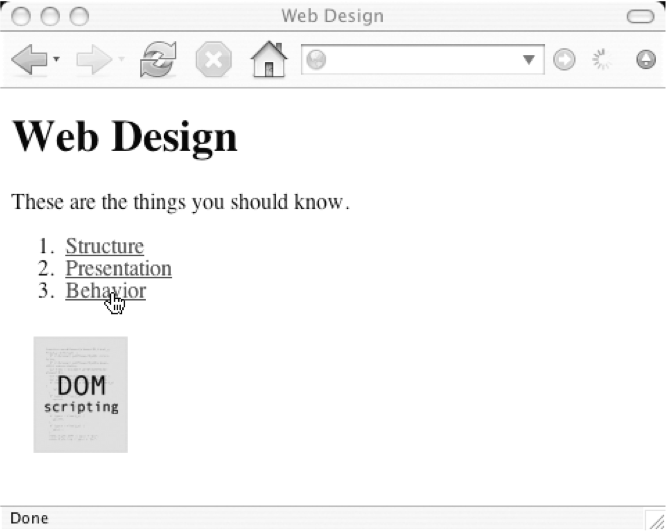{width="4.0in" height="3.1889949693788275in"}The animation now feels much smoother and snappier. When you first hover over a link, the image jumps quite a distance. As the image approaches its final destination, it "eases" into place.
The markup, the CSS, and the JavaScript all come together to create this slideshow effect. Everything is working fine, but there's always room for some small tweaks.
The moveElement function is working really well now. There's just one thing that bothers me. There is an assumption being made near the start of the function:
var xpos = parseInt(elem.style.left);
var ypos = parseInt(elem.style.top);
It's assuming that the element elem has a left style property and a top style property. We should really check to make sure that this is the case.
If the left or top properties haven't been set, we have a couple of options. We could simply exit the function there and then:
if (!elem.style.left || !elem.style.top) {
  return false;
}
If JavaScript can't read those properties, then the function stops without throwing up an error message.
Another solution is to apply default left and top properties in the moveElement function. If either property hasn't been set, we can give them a default value of "0px":
if (!elem.style.left) {
  elem.style.left = "0px";
}
if (!elem.style.top) {
  elem.style.top = "0px";
}
The moveElement function now looks like this:
function moveElement(elementID,final_x,final_y,interval) {
  if (!document.getElementById) return false;
  if (!document.getElementById(elementID)) return false;
  var elem = document.getElementById(elementID);
  if (elem.movement) {
    clearTimeout(elem.movement);
  }
  if (!elem.style.left) {
    elem.style.left = "0px";
  }
  if (!elem.style.top) {
    elem.style.top = "0px";
  }
  var xpos = parseInt(elem.style.left);
  var ypos = parseInt(elem.style.top);
  var dist = 0;
  if (xpos == final_x && ypos == final_y) {
    return true;
  }
  if (xpos < final_x) {
    dist = Math.ceil((final_x - xpos)/10);
    xpos = xpos + dist;
  }
  if (xpos > final_x) {
    dist = Math.ceil((xpos - final_x)/10);
    xpos = xpos - dist;
  }
  if (ypos < final_y) {
    dist = Math.ceil((final_y - ypos)/10);
    ypos = ypos + dist;
  }
  if (ypos > final_y) {
    dist = Math.ceil((ypos - final_y)/10);
    ypos = ypos - dist;
  }
  elem.style.left = xpos + "px";
  elem.style.top = ypos + "px";
  var repeat =
  "moveElement('"+elementID+"',"+final_x+","+final_y+","+interval+")";
  elem.movement = setTimeout(repeat,interval);
}
With that safety check in place, we no longer need to explicitly set the position of the "preview" element. Right now, we're doing that in the prepareSlideshow function. Remove these lines:
preview.style.left = "0px";
preview.style.top = "0px";
While we're at it, let's overhaul the prepareSlideshow function.
The list.html document contains some markup that exists just for the JavaScript slideshow:
<div id="slideshow">
<img src="images/topics.gif" alt="building blocks of web design"
id="preview" />
</div>
If the user doesn't have JavaScript enabled, this content is somewhat superfluous. The div and the img element are there purely for the slideshow effect. Instead of hard-coding these elements into the document, it makes sense to use JavaScript to generate them. Let's do that in prepareSlideshow.js.
var slideshow = document.createElement("div");
slideshow.setAttribute("id","slideshow");
var preview = document.createElement("img");
preview.setAttribute("src","images/topics.gif");
preview.setAttribute("alt","building blocks of web design");
preview.setAttribute("id","preview");
slideshow.appendChild(preview);
Finally, we want these newly created elements to appear directly after the list of links. For this, we'll use the insertAfter function from Chapter 7:
var list = document.getElementById("linklist");
insertAfter(slideshow,list);
The finished prepareSlideshow function looks like this:
function prepareSlideshow() {
  // Make sure the browser understands the DOM methods
  if (!document.getElementsByTagName) return false;
  if (!document.getElementById) return false;
  // Make sure the elements exist
  if (!document.getElementById("linklist")) return false;
  var slideshow = document.createElement("div");
  slideshow.setAttribute("id","slideshow");
  var preview = document.createElement("img");
  preview.setAttribute("src","images/topics.gif");
  preview.setAttribute("alt","building blocks of web design");
  preview.setAttribute("id","preview");
  slideshow.appendChild(preview);
  var list = document.getElementById("linklist");
  insertAfter(slideshow,list);
  // Get all the links in the list
  var links = list.getElementsByTagName("a");
  // Attach the animation behavior to the mouseover event
  links[0].onmouseover = function() {
    moveElement("preview",-100,0,10);
  }
  links[1].onmouseover = function() {
    moveElement("preview",-200,0,10);
  }
  links[2].onmouseover = function() {
    moveElement("preview",-300,0,10);
  }
}
addLoadEvent(prepareSlideshow);
Now we need to make some changes to list.html. We can remove the markup with the "slideshow" div and the "preview" image. We also need to include one more set of <script> tags to reference the insertAfter.js file.
<!DOCTYPE html>
<html lang="en">
<head>
  <meta charset="utf-8" />
  <title>Web Design</title>
  <link rel="stylesheet" href="styles/layout.css" media="screen"
  />
</head>
<body>
  <h1>Web Design</h1>
  <p>These are the things you should know.</p>
  <ol id="linklist">
    <li><a href="structure.html">Structure</a></li>
    <li><a href="presentation.html">Presentation</a></li>
    <li><a href="behavior.html">Behavior</a></li>
  </ol>
  <script src="scripts/addLoadEvent.js"></script>
  <script src="scripts/insertAfter.js"></script>
  <script src="scripts/moveElement.js"></script>
  <script src="scripts/prepareSlideshow.js"></script>
</body>
</html>
Write the insertAfter function to a file called insertAfter.js and place it in the scripts folder:
function insertAfter(newElement,targetElement) {
  var parent = targetElement.parentNode;
  if (parent.lastChild == targetElement) {
    parent.appendChild(newElement);
  } else {
    parent.insertBefore(newElement,targetElement.nextSibling);
  }
}
The other file we need to update is the style sheet, layout.css. Remove this line from prepareSlideshow.js:
preview.style.position = "absolute";
Now place that declaration in the style sheet, where it belongs:
#slideshow {
  width: 100px;
  height: 100px;
  position: relative;
  overflow: hidden;
}
#preview {
  position: absolute;
}
Now refresh list.html in a web browser. You will see no difference in functionality. Everything is behaving just as before. The difference is that now there is better separation of structural, presentational, and behavioral elements. If you view the same page with JavaScript disabled, the slideshow image simply doesn't appear.
Functionally, the JavaScript slideshow is working very well. With JavaScript enabled, the slideshow adds some nice visual feedback, responding to the user's actions. With JavaScript disabled, the functionality degrades gracefully.
If you wanted to visually associate the list of links more closely with the slideshow, you could do that by editing layout.css. You could float the two elements side by side. You could also place a border around the slideshow if you wanted it to stand out more.
1.2 1.3 1.4 1.5 1.6 Module 2: About the DOM (0:46) Module 3: What is jQuery? (5:01) Thank you. The end...